
Welcome to the garden! I love to be in a well-maintained garden, or to work in my own yard. I never tire of the wonder of seeing seeds form new growth, and leaves unfurl. Flowers cause me to stop and smell their sweet perfume, and to admire the Creator’s artwork. It is this love for nature that prompted me to get my B.S. degree in Ornamental Horticulture. I love learning about plants and teaching others to garden. I hope the articles I have here are helpful to you. Please share insights you have from your gardening experiences! Gardeners always have so much to share!
~ Kathryn Hughes, aka Kathryn Breckenridge
In the Garden

TABLE OF CONTENTS
(by order of appearance)
Saving and Sharing Seeds
Seed Propagation
Soil Preparation Using Soil Amendments
Planting to Encourage Birds to Come to the Garden
Daylilies
Defensible Space & Fire Resistant Landscaping
Strawberries
Saving and Sharing Seeds
Gathering seeds is an easy task as flowers finish their life cycle. When seeds have formed on the plant, gather them. Allow the seeds to dry before storing to prevent the development of mildew. I dry my seeds in aluminum pans or shallow dishes, or sometimes hang bunches of flower heads upside down to dry. Remove extra materials such as flower petals, stems, and seed pods. Store the seeds in sealed envelopes, including the name of the plant and the date it was harvested. Keep the dried seeds in a cool, dry place.
- Some flowers that are great for seed gathering include marigolds, Four-o’clocks, zinnia, sunflowers, forget-me-nots, larkspur, bachelor buttons, flax, and nasturtium.
- Save the seeds of cilantro (also known as coriander), radish, and lettuce after they bolt, flower, and set seeds. Beans and peas dried now can be replanted for next year’s harvest.
- Some vegetables and fruit easily share their seeds, such as pumpkin and all types of squash, peppers, cucumbers, and melons. Simply save some seeds when you cut open the vegetable or fruit. Wash the pulp from squash and melons. Spread the seeds out and dry them as instructed above, turning larger seeds for better drying. Pumpkins have enough seeds that you can roast some for eating, too!
- Many tomatoes have self-sown from dropped fruit or from compost. A friend saves seeds from her tomatoes when she slices them, which she plants the following season.
- Label the name of the plant, adding information on when and how to plant, light requirements such as full sun or shade, watering needs, and if possible a picture of the mature plant. Pictures are available online and in seed catalogs.
- Share your seeds. Add a verse and/or a note letting the recipient know you are thinking about him or her. Your friend may find a new favorite plant because of your thoughtfulness.
Have fun sharing!
___________________________________________________________________
Seed Propagation

Seeds are an economical way to grow plants. Seed propagation can be done by the broadcast method, directly sown in the seed bed, or started ahead of time in containers.
Prepare planting beds ahead of time. Clear the area of weeds and grasses and till the soil, adding compost or other organic amendments and fertilizer following the package directions. If you plan to grow vegetables in rows, you can omit the fertilizer at the time of soil preparation and add it at seeding time instead.
Broadcast method: This process is used for wildflowers and lawn grasses. Mix the seeds into fine sand to make it easier to scatter the seeds evenly. Lightly rake over the seeds, water, and apply mulch to prevent seed loss. Plant during the rainy season, or irrigate.
Direct sowing: Rake the prepared soil smooth and moisten it well a few days before planting. If you are using rows, align them in a north-south direction give equal sunlight on both sides of the row. Row spacing depends on the plant’s eventual size, so follow seed planting instructions. Place the fertilizer one to two inches away from the seeds. When seedlings appear, thin them to the proper spacing for proper plant development.
Container planting: Start seeds in a warm place before the last frost date for a jump-start on the growing season. Plants may be transplanted into the garden, or grown in pots if the mature plant is a container-friendly size.
- Obtain pots, tea kettles, or other creative containers, adding drainage holes if absent. Clean them with bleach and hot water to avoid fungal diseases.
- Use potting mix or equal portions of peat moss, potting soil, and vermiculite. Gently firm the soil about one inch from the top of the container. Plant the seeds in the moist soil mix, following the package directions.
- Water gently to not disturb the seeds. Keep the seed mixture moist but not wet. Placing the container into a clear plastic bag and tying it will allow seeds to germinate without needing additional water. After the seedlings sprout their leaves, remove the bag, watering as needed until the seedlings are ready to be transplanted.
- Thin or transplant seedlings when they have their second pair of true leaves. Loosen the roots carefully to separate the seedlings, handling the plants by their leaves instead of the stems. After transplanting, firm the soil around the seedlings and water right away.
- Fertilize with a half application of fertilizer or with a slow-release fertilizer. The transplants will be ready for your garden a few weeks later. Enjoy watching them grow!
___________________________________________________________________
Soil Preparation Using Soil Amendments
Does your yard have good soil, or does it challenge you plant growing efforts? The soil may consist of clay, rock, sand, or a combination depending on where it is.
Test the soil texture. Wet the soil and let it dry for a day. Take a ball of soil in your hand and squeeze it. If it holds together and is somewhat slippery, it is predominately clay. Sandy soil feels gritty and the soil ball falls apart. Loam is slightly crumbly but holds its shape.
Clay, or heavy soil, is made up of tiny, close-fitting mineral particles which hold the nutrients, leaving little space for water and oxygen. Drainage is slow, and clay dries hard. Sandy soils have large particles, allowing for rapid drainage and the leaching of nutrients. Loam soils are the most desirable, because they a mixture of clay, sand, and silt. The soil drains well, but not too quickly, and there is enough air space for healthy root growth.
Proper soil preparation is essential for optimum plant growth. Deeply dig the soil, adding nutrients and amendments to correct soil problems such as drainage, or acidic or alkaline soil.
Organic matter adds to the fertility of all soil types. Organic matter improves the aeration of clay soils, and helps sandy soil retain moisture and hold nutrients. Add to a rate of 25-50 % of the total soil volume. Sources of organic matter include manure, ground bark, saw dust, peat moss, and compost.
Test the soil pH for soil acidity (low pH) or alkalinity (high pH). Kits are sold in garden centers and some agricultural services offer testing. Most plants grow well with a mildly-acid to neutral soil. Neutral soil has a pH of 7.
Plants such as camellias and azaleas prefer an acid soil, which can be obtained with the addition peat moss, the use of acid-type fertilizers, and the periodic application of chelates.
If the soil is too acidic for your plants, raise the pH of acid soil with calcium carbonate (lime). Dolomitic limestone adds magnesium as well as calcium to the soil, an added benefit to plants.
Alkaline soils are common in areas receiving light rainfall. The soil is high in lime, sodium, or specific other minerals. Lower the pH by adding sulfur. Plant in raised beds amended with organic matter if the soil pH is too high.
Deep watering with rapid drainage can lessen the alkalinity of soil and leach out excessive salts which cause salinity problems, leaf burn, stunted growth, and inhibited seed germination. Salts can be present in the soil, or may come from water (especially softened water with a high sodium content), manures, fertilizers and chemical amendments that have a high salt content.
It takes effort to prepare the soil, but the growth will be worth it!
Happy gardening!
_____________________________________________________________
Planting to Encourage Birds to Come to the Garden

Birds are enjoyable to watch in the garden, and one can find many birdhouses and feeders to attract them. Providing wildlife-friendly plants can also encourage the presence of feathered friends. Help provide food and shelter for animals with shrinking habitats. Attracting birds to the garden has the added benefit of bringing in natural predators for the insects that attack plants. Birds, as well as butterflies, bees, and beneficial insects, need sources of water, food, and shelter.
Water features in the garden such as a bird bath, a fountain, a waterfall, or a small pond provide needed water for wildlife. Change standing water such as a birdbath frequently to prevent mosquitoes, and to keep the water fresh for desired visitors.
Native plants are especially good sources of food and shelter as they are familiar to local wildlife and adapted to the climate. Native plants also use less water.
Many birds are attracted to plants that produce fruit or seeds. Birds love my grapes, and my vine is prolific enough to gladly share with them. (Vines and fruit trees can be netted to prevent damage to fruit.) Birds flock to the red berries that follow the white flowers of my neighbor’s pyracantha bushes, and the plant’s thorns and branches offer protected shelter.
Leave seed pods to develop after flowers are spent. The birds will relish them, yet there will still be some to plant for the following year. The birds help with the sowing, too.
Hummingbirds are attracted to the nectar in brightly colored deep-throated flowers. While they dine on the nectar of flowers such as fuchsia, honeysuckle, and from flowers from many succulents, they pollinate the plants. Hummingbirds also eat insects.
Choose plants that flower and fruit at different times of the year. Provide leafy or twiggy shrubbery for nesting places. I often have birds in my camellias under my kitchen window; they startle easily as we walk along the front walkway, sometimes startling us in turn. Offer suitable nesting areas away from high traffic areas for those birds who like a more quiet location.
A short list of bird-attracting plants follows, though there are many others. Enjoy the bird chorus!
- Fruit and/or Seeds:
- Arbutus menziesii (Madrone)
- Arbutus unedo (Strawberry tree)
- Blackberry
- Coreopsis
- Cosmos
- Cotoneaster
- Euonymus
- Fig, edible
- Grape
- Ilex (Holly)
- Malus (Crabapple)
- Oak
- Pine
- Pyracantha
- Persimmon
- Sorbus (Mountain Ash)
- Strawberry
- Sunflower
- Nectar:
- Aloe
- Calistemon (Bottlebrush)
- Columbine
- Daylily
- Delphinium
- Digitalis (Foxglove)
- Fuschia
- Hibiscus
- Impatiens
- Kniphofia (Torch lily)
- Lupine
- Monard (Bee Balm)
- Sage
__________________________________________
Daylilies
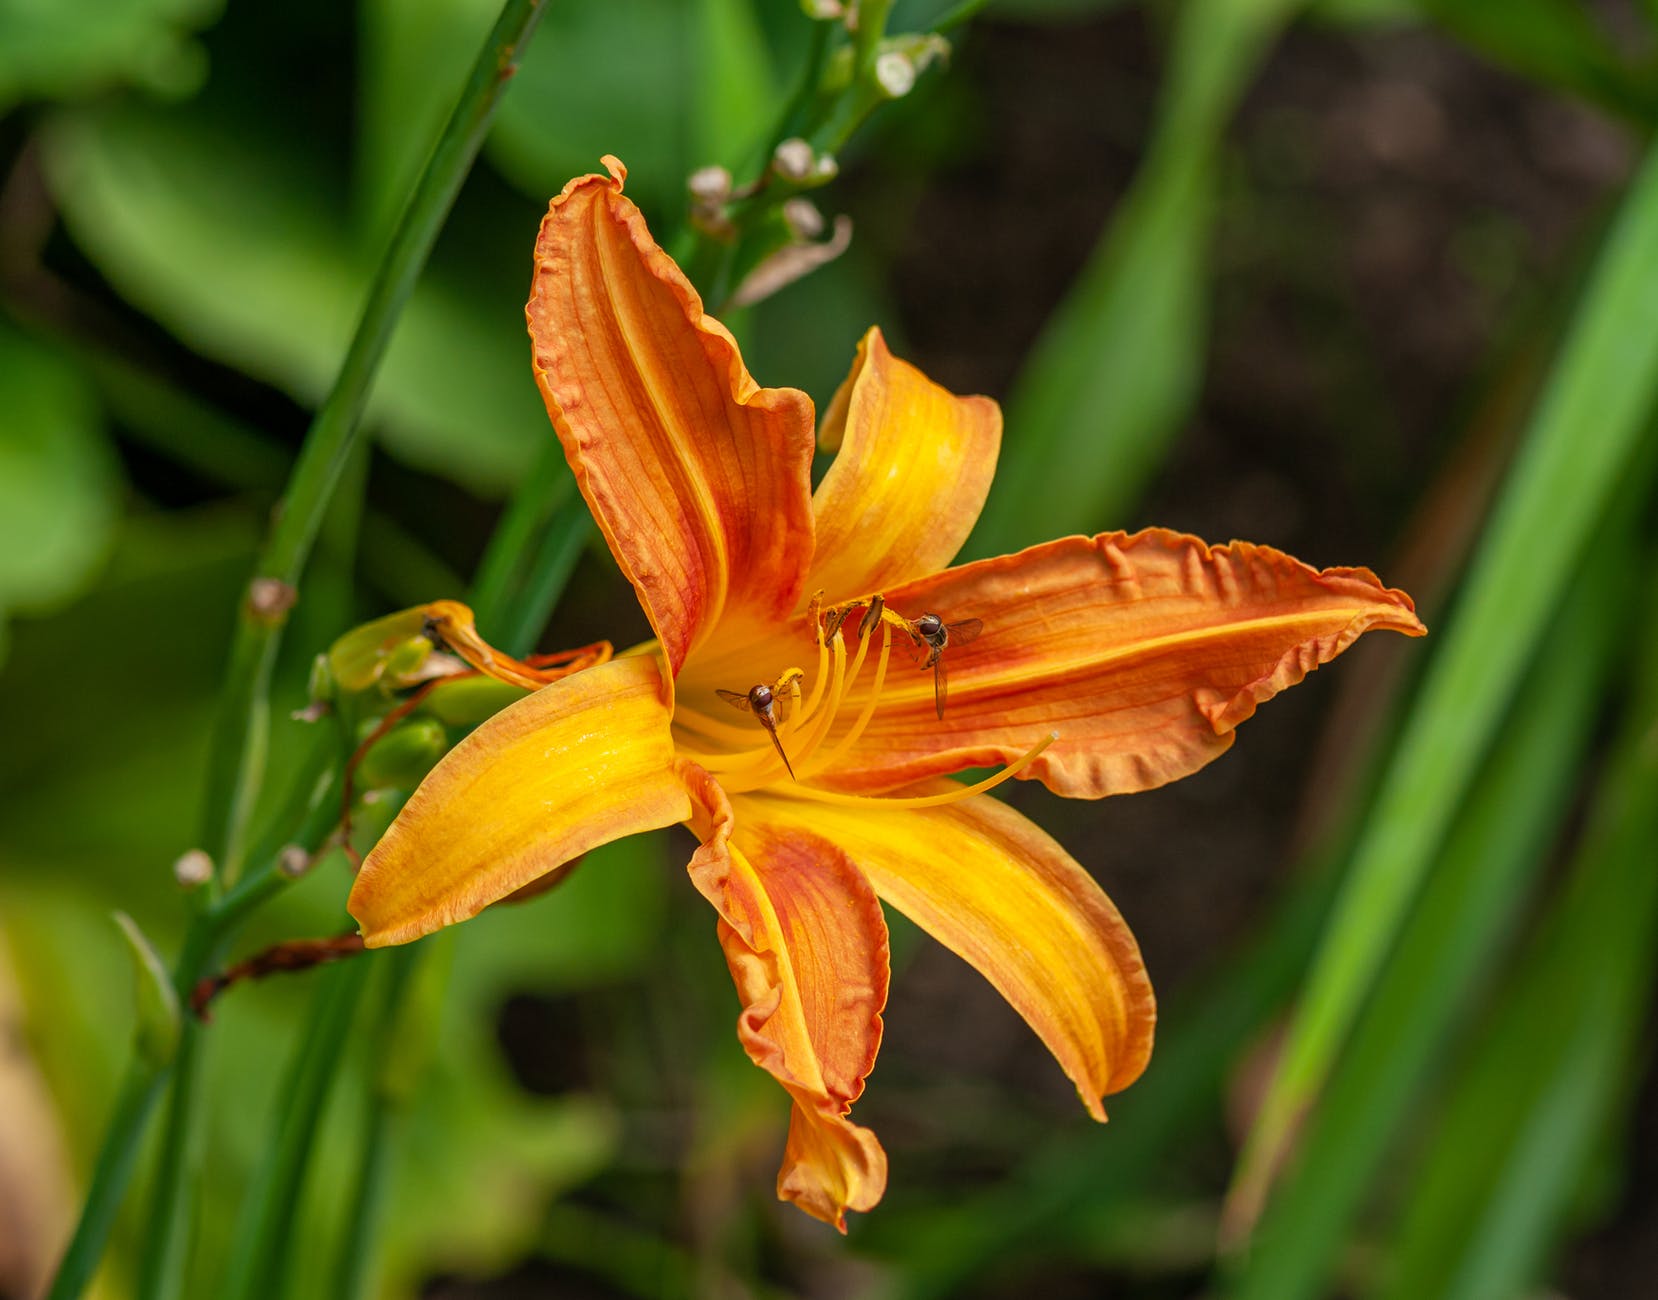
Daylilies (Hemerocallis) seem to be one of the most contented plants I know. Contentment may seem like a strange attribute to ascribe to them. Let me explain. Daylilies have become one of the most popular perennials grown. There are few plants that are more durable and pest free. They adapt to almost any kind of soil, even sand. They resist drought with a deep soaking in extra dry spells even though they prefer a moist location with thorough watering while flowering. Daylilies bloom in sun or part shade. Afternoon shade is helpful in the hottest areas as they may fade if in the full sun all day. Red-flowered daylilies need warmth to develop their best color. I think of them as content because they bloom where they’re planted.
Daylilies reach an overall height from 14 inches (dwarf) to 6 feet, depending on the variety. Most are no taller than 4 feet. Large clumps of arching, sword-shaped leaves are deciduous or evergreen. The lily-like flowers are 3-8 inches across, appearing in open or branched clusters at the ends of stems above the foliage. Flower colors range from yellows, oranges, bronze, reds, pinks, creamy white, bicolors, and the ‘Little Grapette’ is royal purple. Flowers may be single, semidouble, double, broad-petaled or narrow. “Tetras,”or tetraploids, have heavily textured flowers. Some varieties, like the Lemon Daylily, are fragrant.
Plant early, mid season, and late varieties for bloom from May to October (in a mild climate). Some varieties bloom two or three times a year, such as the Daylily ‘Little Business’ from Jackson & Perkins, which blooms at the beginning of the season and again in August.
Daylilies are excellent cut flowers; cut stems that have well-developed buds. Buds will open on successive days with each flower lasting about a day.
Plant Daylilies in spring or early fall either from nursery stock or by dividing clumps that have become too big. The daylily has tuberous, somewhat fleshy roots instead of a bulb like a true lily. To divide a daylily, dig up the plant. Separate it into smaller pieces by slicing it with a spade or by using two spading forks. Cut off part of the roots, and also all of the leaves before planting the divisions. The first year after the division, flower bloom will be less prolific but they will bloom profusely the following year.
Feed the plants in spring and midsummer using a complete fertilizer containing nitrogen, phosphorus, and potassium, known by their respective chemical symbols as N, P, and K.
The versatile daylily may be planted almost anywhere. They are content to live near pools, foundations, in borders, along driveways and under shade trees. Whether in a container or naturalized along the roadside, the daylily is sure to please.
# # #
________________________________________________________
Defensible Space and Fire-Resistant Landscaping
By Kathryn Hughes

Wildfires swept through parts of San Diego County in May 2014, yet a smaller percentage of homes and other structures were lost than in the wildfires of 2007 or 2003. Repeatedly that was attributed to not only better communication and use of resources between the different agencies helping fight the fires, but to homeowners’ use of defensible space and fire resistant gardening. What does defensible space mean? How does fire-safe gardening differ from just keeping the landscape cleared of debris?
Cal Fire defines defensible space as “the buffer you create between a building on your property and the grass, trees, shrubs, or any wildland area that surround it. This space is needed to slow or stop the spread of wildfire and it protects your home from catching fire – either from direct flame contact or radiant heat. Defensible space is also important for the protection of the firefighters defending your home.”
In 2005, California state law extended the defensible space clearance around homes and structures from 30 feet to 100 feet. Defensible space is broken into two zones. Zone 1 is the first 50 feet around a structure in San Diego County, and Zone 2 is the remaining of the 100 feet clearance.
Some of the points of a defensible space are common sense: use fire-resistant building materials for the roof and structure, keep screen mesh over chimneys as is required by law, and remove branches from touching the house and keep them a minimum of ten feet away from chimneys. Properly maintain lawns and other landscaping and remove dead branches, brush, and weeds. Roofs and rain gutters must be clear of dry leaves and pine needles. We had to remove a 50 year-old pine tree from our yard, or our house insurance would have been cancelled because needles were on the roof between cleaning sessions.
Other defensible points are less obvious. Firefighters need room to maneuver so they can fight a fire safely. Plants that are flammable should be removed or pruned around windows. Remove vegetation and items that can catch fire from around and under patios and decks, and separate things that can catch fire. For example, placing the patio furniture under the tree and the wood pile near the outdoor fireplace are both fire hazards. The wood pile should be relocated to Zone 2, 50 feet or more away from the house or other structure.
Landscaping for a defensible space differs from many landscape plans. Both vertical and horizontal spacing between trees, shrubs, and other plants are used to prevent fire from spreading. Instead of a tiered layering of plants from ground cover to shrub to tree, the potential fire ladder between plants is eliminated. It is recommended that trees have 5-15 feet of vertical clearance between ground level and the bottom branches. If a shrub is below a tree, there needs to be three times the height of the shrub between the lower plant and the bottom branches of the tree.
Horizontal clearance requirements differ depending on the topography of the ground and the height of the trees or shrubs. On a flat to mild slope, trees should be trimmed to keep branches a minimum of ten feet from other trees. Other plants need a spacing of two times the height between them. The spacing increases on slopes. It is recommended that trees have 20 feet between their branches on a 20-40% slope, 30 feet spacing on steeper slopes. Spacing for shrubs and other plants is four times their height on the mild to moderate slope; on slopes of greater than 40% that spacing jumps to six times the height.
Mulch helps plants maintain moisture. However, bark mulches need to be kept moist when they are close to structures or they become a fire hazard. Using gravel, decorative rock, or a combination of bark and rock is a less flammable option.
Hardscape, or the non-living part of a landscape, is fire resistant if done in noncombustible materials. Use masonry, concrete, gravel and stone for pathways, walls, decks, patios, ponds, swimming pools, and driveways. These areas can act as fire breaks and help prevent the spread of fire.
Fire-safe gardening differs from a well kept landscape by using plants that are fire resistant. No plants are fire proof, some just take longer to catch fire and burn.
Some fire resistant plants also have low water requirements which are useful for landscaping in our dry region. Groundcovers such as sedum and Sempervivum species are good succulent choices, while creeping thyme works well between pavers and offers summer flowers. Perennials such as yarrow (Achillea), coreopsis, coneflower (Echinacea), Gaillardia, iris, and daylily add colorful blooms, as do shrubs of native California lilac (Ceanothus) and sage (Salvia). Other shrubs you may consider are spirea, orchid rockrose (Cistus purpureus) and shrub roses. There are many trees that are fire-resistant. Western Redbud (Cersis occidentalis), common hackberry (Celtis occidentalis), and some types of ash trees are just a few that are drought tolerant once established.
Avoid plants that are highly flammable. These include plants which contain oils, gums, or resins such as eucalyptus, pines, and other conifers; plants which accumulate dead plant material such as pine, juniper, and palms; and those that have a papery or loose bark. During the Cedar fire of 2003, palm trees were torches as dead palm fronds caught fire, and groves of eucalyptus burned in Scripps Ranch. A friend of mine had her juniper plants burst into flame as she was escaping her Rancho Bernardo home during the 2007 Witch Creek Fire.
Plants that resist burning include well maintained turfs, well-watered annuals, plants with high moisture content such as ice plant, aloe, and other succulents, and plants that have little deadwood and that do not tend to accumulate dry, dead material within the plant. Look for plants whose leaves stay moist under well maintained conditions. Deciduous trees and shrubs tend to not be as flammable as evergreens. Good maintenance is needed for any plant to prevent a build-up of combustible debris. Even fire resistant plants will accumulate tinder-dry leaves and twigs and will grow beyond the recommended spacing if maintenance is neglected.
One hopes to never need to defend against fire, but by implementing a plan for defensible space and by using fire resistant plants you may get through another fire season safely.
* * *
#Defensible Space # Fire Safety #Fire-Resistant Plants
This article appeared as “Defensible Space and Fire-Safe Gardening” in my “Farm & Garden” column in the July 2014 issue of the Poway Progress newspaper.
___________________________________________________________________
STRAWBERRIES

What fruit can match the delicious taste of juicy, sun ripened strawberries? The fruit brings a natural sweetness to strawberry shortcake, fruit salads, and jams. Piled high in a pie shell, strawberries add beauty to the dessert table.
Spring is the time to begin planting for these mouth-watering red jewels of the garden, as everbearers planted now will produce crops in the summer and fall. Plants that have been planted in late summer or fall will produce the following spring. There are many varieties of strawberry to choose from, making it possible to have fruit ripening over a long season. Obtain plants that are certified virus-free. Pinch off the earliest blossoms to encourage stronger plants.
Strawberries enjoy a sunny location with well-drained soil. Planting can be done in rows or raised mounds about 5-6 inches high, using furrow irrigation, or on flat ground with overhead watering. They also do well as container plants. Plant strawberries 14-18 inches apart, with the crown just above the soil level to prevent crown rot. Roots should be no closer than 1/4 inch from the soil surface or they will dry out.
Most varieties produce offset plants on runners. Pinching the runners will produce fewer but larger berries on large plants. Runners may be left to produce offset plants, filling in the garden space to 7-10 inches apart. Replace plants every three years, every two years for everbearers.
Strawberries need frequent deep soaking, especially during the bearing season. Mulch to keep down weeds and conserve moisture. Feed at planting time and again after the first crop, as nitrogen is especially necessary.
I’ve only been bothered by snails, slugs and pillbugs in my strawberries. Snails and slugs can be deterred by hand picking, or with shallow containers of beer or yeast and water placed about 20 feet away from the garden to attract them. Pillbugs and can be encouraged to congregate on orange rinds and removed by hand. Cornmeal is hard for pillbugs to digest, and can be dusted around the plants to reduce the pillbug population.
Strawberries can also be attacked by spider mites and aphids, red stele (root rot), verticillium wilt, and yellows (a virus). If using chemicals, use only before the fruit has set. Use netting to prevent theft from birds. Keep the plants clean of rotting fruit.
Protect strawberries from frost when temperatures drop in late fall or early winter with a four-inch cover of mulch such as loose straw or tree leaves. Remove the mulch cover when growth resumes in spring. Usually most of the tree leaves decompose prior to the growing season, but they last long enough to provide the needed protection during the winter.
Strawberry plants are an attractive addition to the garden with their white flowers and red fruit decorating the clumps of green. They are sure to be enjoyed even before eating the tasty fruit.
From my FARM & GARDEN column from the March-June 2000 issue of the Poway Progress newspaper
###

